
The Problem Every Family Recognizes
If you are on a mobile device and prefer to skip the deep dive, you can jump straight to our signature lay-flat spreads right now ✨ View Our Custom Album Collections or visit our ✨ Home anyway.
You’ve got a shoe-box. Maybe three. Somewhere in a closet, a garage shelf, or the back of a cabinet, there are decades of your family’s history quietly fading. Birthday parties from the 1980s. Your parents’ wedding. Your kids’ first steps, captured on film before smartphones existed. You’ve always meant to do something with them — but between life, work, and everything else, that shoe-box stays right where it is.
You’re not alone. This is one of the most common things we hear from families across Central Texas. The photos exist. The intention exists. What’s missing is a clear, manageable path from that pile of prints to something you can actually hold, display, and pass down.
That path is exactly what this guide is about. By the time you finish reading, you’ll know precisely how to scan and digitize old photos, choose the right album, and end up with a finished heirloom you’ll be proud to leave on your coffee table — or hand to your grandchildren someday. Let’s walk through it together, step by step.
Sort and Assess Before You Scan and Digitize Old Photos Into Album
Before anything gets scanned or digitized, take thirty minutes to do a simple sort. You don’t need to organize everything perfectly — that comes later. Right now you just need to know what you’re working with.
Pull everything out and separate it into rough categories: loose prints, photos still inside albums, slides, and negatives. Each one requires a slightly different approach when it comes time to scan and digitize your old photos, so knowing what you have upfront saves real time and money later.
Pay attention to condition too. Photos that are faded, stuck to magnetic album pages, or showing water damage need gentle handling — they’re still absolutely salvageable, but they’ll need more care than a crisp 4×6 from 1995. Don’t let that discourage you. Some of the most beautiful finished albums we’ve seen at Crafted Memories started as the most chaotic boxes of prints imaginable.
One tip worth repeating: resist the urge to date and label everything before scanning. That rabbit hole will stall the whole project. Sort into broad categories, set them aside in order, and move on to the next step.
Choose Your Scanning and Digitizing Method
This is the most important decision in the whole process — and the one most people make without enough information. How you choose to scan and digitize your old photos directly affects the quality of everything that comes after, especially if a premium album is your end goal.
You have three real options.
DIY scanning — using a smartphone scanning app or a home flatbed scanner — is fine for a handful of photos you want to share quickly on social media. But the resolution rarely holds up when you’re creating large album prints. Home scanners typically cap out at inconsistent quality, and phone apps struggle with color accuracy on older prints. If display quality matters to you, this option has limits.
National mail-in services like Legacybox or ScanMyPhotos offer an affordable way to digitize in bulk. You box up your photos, ship them off, and get digital files back. For sheer volume, they work. But they’re assembly-line operations — your photos are one order among thousands, the color correction is minimal, and you’ll receive files with no curation, no organization, and no path to a finished album. You still have to do all the creative work yourself.
Local and Central Texas-based services offer something the national mail-in players simply can’t — a personal, attentive experience where your photos are treated as the irreplaceable memories they are, not just another bulk order. When you work with someone local, you get real communication, careful handling, and — most importantly — the ability to go from digitized photos straight into premium album design without starting over with a different company entirely.
If your end goal is a premium finished album — not just a folder of files sitting on a hard drive — the method you choose for scanning and digitizing matters enormously. Quality in, quality out.
Organize your digital files before design
Most people skip this step. Almost everyone regrets it.
Once your photos are scanned and digitized, you’ll have anywhere from a few dozen to several hundred image files sitting on a hard drive or in a folder. If you dive straight into album design without organizing first, you’ll spend twice as long hunting for the right photo at the wrong moment.
A simple folder structure is all you need. Organize by decade first, then by event or occasion within each decade. Something like: 1980s → Family Vacations, 1990s → Holidays, 2000s → Kids’ Milestones. You don’t need perfection — you need enough structure that you can find the photo of Grandma at Thanksgiving 1987 in under thirty seconds.
While you’re at it, set up a cloud backup right away. Google Photos and iCloud both work well as a free safety net. Your originals can fade or get lost — your digital archive should never be in only one place.
A consistent file naming convention also pays off later. Even something simple like 1985_Family_Beach_Trip_001.jpg is infinitely better than IMG_4471.jpg when you’re trying to build a coherent album story six months from now.
This step is unglamorous. It’s also what separates a chaotic digital dump from a collection you can actually enjoy and share.
Curate — Don’t Dump
Here’s the truth about photo albums that most people don’t hear until it’s too late: more photos does not mean a better album.
The average family digitizing a lifetime of memories ends up with 300 to 500 scanned images. A beautifully designed 40-page premium album tells its story through roughly 60 to 80 carefully chosen photographs. That means your job before design begins is editing — selecting the images that matter most and setting the rest aside.
This is harder than it sounds, and it’s where most DIY album projects stall. Every photo feels important when it’s your family. But a great album isn’t a complete record — it’s a curated story. The difference between flipping through an album and feeling something versus just seeing a pile of chronological snapshots comes down entirely to curation.
Here’s a practical way to approach it. Instead of going photo by photo asking “is this good enough?”, go story by story. Ask yourself: what are the five to eight chapters of this collection? A childhood. A marriage. A decade of holidays. A grandmother who was the heart of the family. Build your selection around those chapters, and choose the images that move the story forward.
This is exactly the kind of thinking that goes into every album Crafted Memories designs. When clients come to us after scanning and digitizing their old photos, helping them find the story inside the collection is often the most valuable thing we do.
Choose the right album for your photos
Not all photo albums are created equal — and the type of collection you have should guide the album you choose.
A multi-generational family history spanning fifty years of loose prints and slides calls for something different than a single wedding or a milestone birthday. For deep family archives, a larger format album with generous page spreads lets multiple images breathe together and tell a layered story. For a focused occasion — an anniversary, a graduation, a tribute to someone you’ve lost — a more intimate size with bold full-page images often hits harder emotionally.
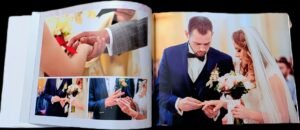
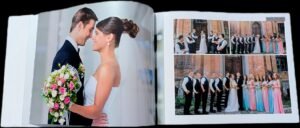
What separates a premium album from a drugstore photo book comes down to three things: lay-flat binding, archival-quality paper, and the cover material. Lay-flat pages mean no photos disappear into the spine. Archival paper means the colors won’t shift or fade over decades. And a cover — whether it’s genuine leather, fabric, or a stunning acrylic face panel — is what makes someone pick it up off the shelf in the first place.
This is where your scanned and digitized photos stop being files on a hard drive and start becoming an heirloom. The right album for your collection is out there — and choosing it thoughtfully is what makes the difference between something you display with pride and something that sits in a drawer.
Take a look at our premium album collections to see what’s possible. We’re happy to help you find the right fit for your photos and your story.
Design with intention
You’ve scanned. You’ve organized. You’ve curated. Now comes the part that ties everything together — and where the final quality of your album is truly decided.
Album design is more than arranging photos on a page. A thoughtful designer considers flow — how the eye moves across a spread, how images relate to each other, which photo earns a full page and which works best as part of a group. They account for color balance across scanned prints that may have shifted slightly over the decades, ensuring the finished album looks cohesive rather than patchwork. They think about the cover image — the one that sets the tone before the reader even opens the first page.
Professional design versus doing it yourself is an honest choice. If you enjoy the creative process and have the time, DIY tools like Canva or Shutterfly can produce decent results for casual use. But for a collection you’ve invested real effort in — photos that have been carefully scanned, digitized, curated, and selected — professional design is what honors that investment.
At Crafted Memories, our design process is built around one principle: the best albums tell a story someone can read without captions. Every layout decision we make is in service of that. Your photos did the hard work of capturing those moments. Our job is to present them in a way that makes the emotion land every single time someone opens the cover.
The bundle advantage
Here’s something worth saying plainly: most people treat scanning and album creation as two completely separate projects. They send their photos to a mail-in service, get files back weeks later, and then start the whole creative process from scratch with a different company. It’s disjointed, it takes longer, and something gets lost in the handoff.
There’s a better way.
When scanning and album design happen under one roof, with one team who understands both the technical quality of the scans and the creative vision for the finished product, the result is noticeably different. Color matching is tighter. The curated selection happens with the final layout already in mind. There’s no lag between “I have my digital files” and “I have my finished album” — it’s one continuous, guided experience.
At Crafted Memories, we can take you from a shoe-box of loose prints all the way to a finished premium album — scanning your photos, designing your layout, and delivering a product you’ll be proud to hand down for generations. Central Texas families have trusted us with their most irreplaceable memories, and we treat every collection with exactly the care it deserves.
If you’re ready to stop letting those photos sit in a box and start turning them into something lasting, we’d love to hear from you. Reach out via WhatsApp or browse our premium album collections below — and let’s build something worth keeping.
Frequently Asked Questions
-
How much does it cost to scan and digitize old photos in Austin, Texas? Pricing varies depending on the volume and type of media. Loose prints typically run around $1.00 per image at professional quality, while slides and negatives range from $1.50 and up due to the specialized equipment required. Most families with a moderate collection of 200–400 photos invest between $200 and $500 for professional scanning. At Crafted Memories, we’re happy to give you a clear picture of what your specific project would look like — just reach out for a quick consultation.
-
What’s the difference between scanning and digitizing? Scanning refers to the physical act of capturing an image using a scanner — passing light over a print or negative to create a digital file. Digitizing is the broader term for the whole process of converting physical media into a digital format, which can include scanning, color correction, file organization, and backup. In practice, most people use the two terms interchangeably, and that’s perfectly fine. What matters is the end result: high-resolution digital files that preserve your photos faithfully.
-
Can I scan negatives and slides at home? You can, but the quality gap between home equipment and professional scanners is significant for these formats. Slides and negatives require specialized film scanners or camera-lightbox setups to capture at the resolution needed for quality prints — typically 4000 ppi or higher. Most home flatbed scanners with a film adapter produce results that look acceptable on a phone screen but fall apart when enlarged for an album spread. For slides and negatives you care about, professional scanning is genuinely worth it.
-
How many photos fit in a premium album? A standard premium album in the 10×10 or 12×12 format typically holds between 60 and 100 photos across 40 to 50 pages, depending on layout choices. Some spreads feature a single bold image; others group three or four smaller prints together. The goal is never to fit as many photos as possible — it’s to give each chosen image the space it needs to make an impact.
-
How long does the whole process take? From initial sorting to finished album in hand, most projects run four to eight weeks, depending on the size of the collection and the complexity of the design. Professional scanning of a 300-photo collection typically takes three to five business days. Design and production of a premium album runs two to four weeks from approved layout to delivery. Starting sooner rather than later is always the right call — especially if your album is tied to a milestone, a reunion, or a gift deadline.
Proudly listed in The Aisle Wedding Directory.
 ⚙️ About Crafted Memories Scanning and Digitization Service & FAQ
hose old printed photos sitting in shoeboxes and drawers are not just pictures — they are irreplaceable family treasures quietly fading with time. CraftedMemories Photo Albums specializes in professionally scanning, digitizing, and transforming your old prints into beautifully designed premium layflat Treasure Albums — handcrafted in Belton, Texas and shipped nationwide. Your hidden gems deserve better than a drawer.
Frequently Asked Questions
What types of old photos can you scan and digitize?
Do you accept slides and negatives?
How do I safely mail my old photos to Crafted Memories?
What resolution do you scan photos at?
Can you restore damaged or faded old photos?
What happens to my original photos after scanning?
What is a Treasure Album?
How long does the scan and digitize process take?